Migrate from the node target to the typescript target
We've released a "v2" of our Node/TypeScript SDK generator, dropping support for EOL versions of Node and replacing node-fetch with the now-stable built-in fetch. In the process, we renamed the target from node to typescript to more accurately describe the environments we support. (Our SDKs have never just been for Node.js!)
The new SDKs are lighter, more consistent, and are dependency-free out of the box. We've also made a number of internal improvements.
For more information on the changes we made, see the changelog entry.
Before migrating
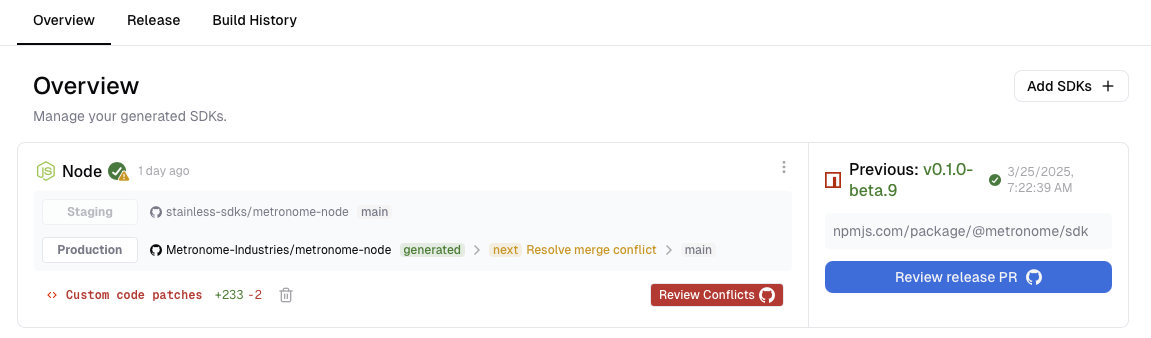
Custom code conflicts
To avoid problems during the migration, make sure your Node SDK does not have any open conflict PRs.
- Go to your project's "Overview" page.
- If you see an open conflict, resolve it first. See our custom code documentation for more details.
Production repositories
You will need to decide whether you want to reuse your Node SDK's prod repo as-is, rename it (e.g. from my-node-sdk to my-typescript-sdk), or create a new repo (to make it easier to refer to the previous version's source code).
- If you'd like to keep the same prod repo and name, no action is needed and you may continue with the migration steps.
- If you're reusing the existing prod repo, but would like to rename it (e.g., from
my-node-sdktomy-typescript-sdk), first complete the migration steps, then rename the GitHub repo and update theproduction_repokey in your Stainless config. - If you'd prefer to create a new production repo, do so before migrating.
Migration steps
-
Note the current version of your
nodeSDK from itspackage.json. -
Choose a new version number. This is a breaking change, so if you have released a v1 you'll need to bump the major version (e.g., v1.x.x → v2.0.0).
-
In your Stainless config, add a new
typescripttarget:targets:
node: # <-- Your existing node target
package_name: my-sdk
production_repo: my-org/my-sdk-node
publish:
npm: true
typescript: # <-- The new typescript target
package_name: my-sdk # Same name as for node
production_repo: null # Don't set the prod repo yet
publish:
npm: false
options:
node_migration: # These values will be used in the generated migration guide
previous_version: '1' # Last version number before migration
migrated_version: '2' # New version number for the `typescript` SDK -
Save and build. A new staging repository named
<project_name>-typescriptwill be created. -
Review the
MIGRATION.mdfile generated in the typescript staging repo and ensure everything looks correct. -
Update the
typescripttarget to use the prod repo, set thepublish.npmflag totrue, and remove thenodetarget. If you prefer to keep the node target in your config, set itsproduction_repotonull.warningBe sure to not trigger a new build when both
nodeandtypescripttargets have the sameproduction_repovalue.targets:
typescript:
package_name: my-sdk
production_repo: my-org/my-sdk-node # Updated prod repo
publish:
npm: true # Enabled NPM publishing
options:
node_migration:
previous_version: '1'
migrated_version: '2' -
Save and build. A release PR will be opened with the new
typescriptSDK and migration guide. If the version isn't what you expected, update the PR title to correct it.
You're all set! 🎉
Your SDK is now using our typescript SDK generator, with zero dependencies and an improved developer experience.
If you have questions or run into issues, email us at [email protected].